Trouble Shooting: The sample won't spin
You’ve walked up to the NMR and “Oh, no!” The sample won’t spin. What has gone wrong? What can we do to fix it? Don’t worry. Don’t stress. We’ve got you covered. Dive in with today’s blog post explaining how to make that sample spin again.
Grab any old NMR textbook and it will say this: sample rotation is essential to NMR. It’s one of many features that distinguish Anasazi Instruments from current benchtop systems on the market. It is also why the vast majority of high-field instruments still rotate samples after all these years. Spinning is necessary to enhance resolution and performance by increasing apparent field homogeneity. If you can’t eject and re-inject the sample to create rotation, it’s simply time to clean the probe. Trust us! No. Big. Deal.
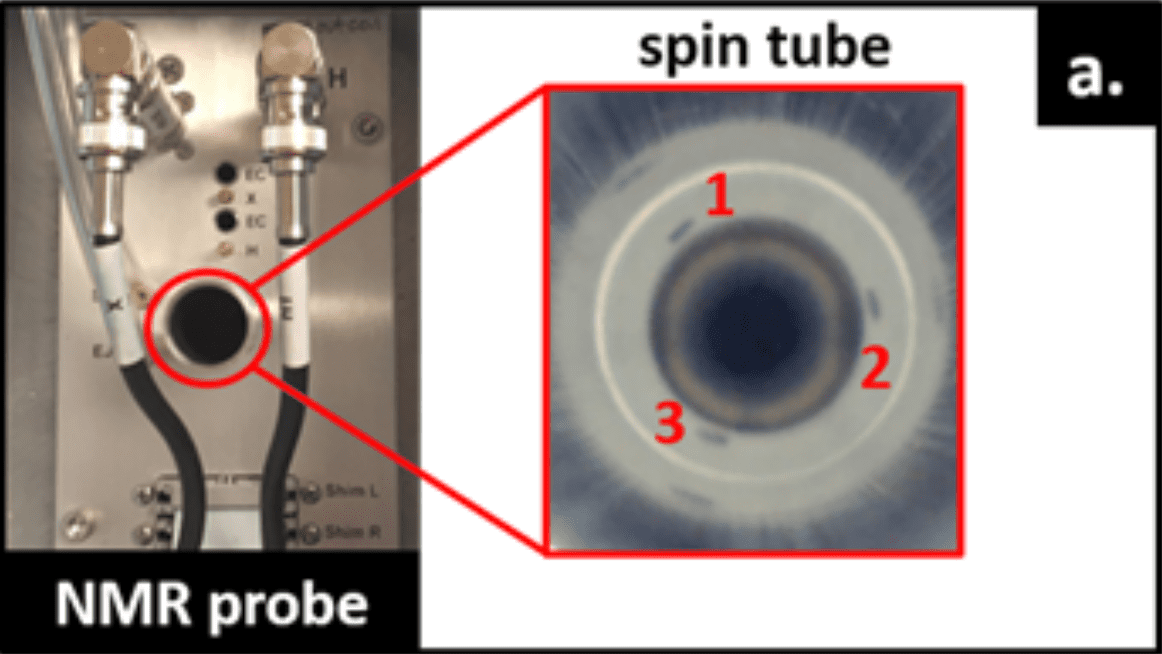
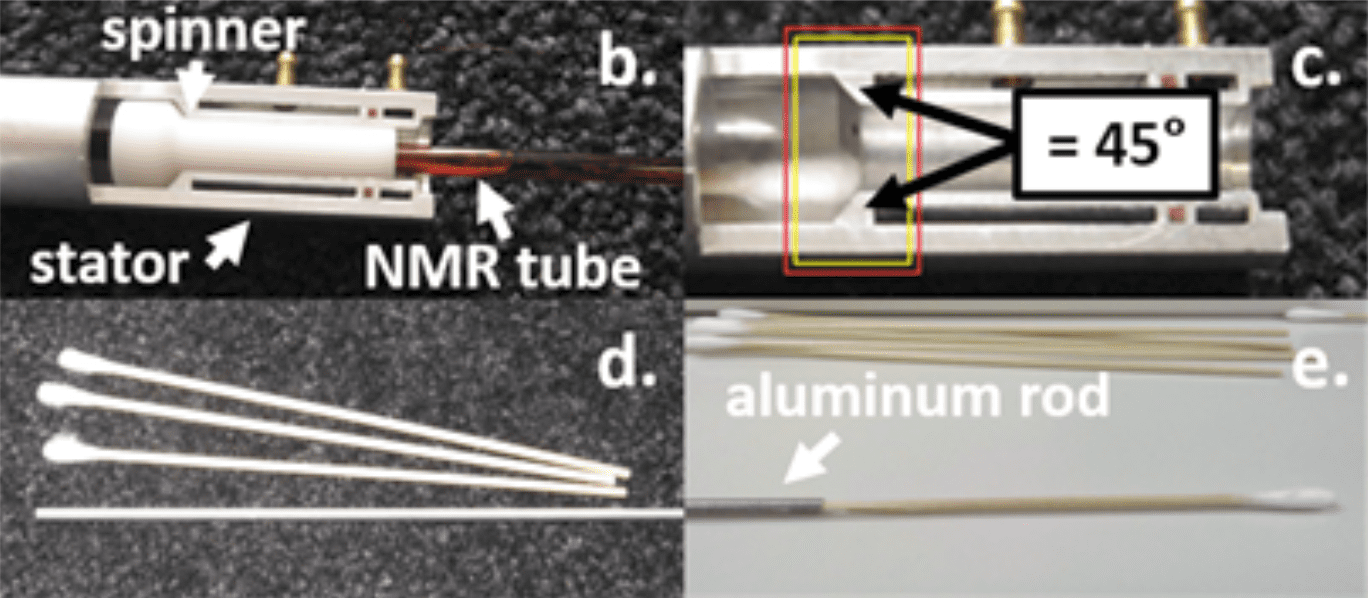
So relax, grab your phone, and flip on the flashlight! With the sample removed, take a look inside. A top-down image of the NMR probe is shown here in Figure 1a. Several inches down the spin tube along the perimeter are three small machined holes. Finding them means you’ve located the stator, the component providing lift and spin during data acquisition. A cross section of the stator is shown in Figure 1b. The stator (silver) holds a spinner (white) and NMR tube (amber). We want to clean the surface in contact with the spinner. Figure 1c highlights this surface including the 45° angle where the air holes have been drilled. Your cleaning effort will focus specifically on this region.


Figure 1: Probe cleaning essentials including (a) NMR probe and spin tube (b) spinner, stator, and sample, (c) stator enhanced to show 45° surface, (d) probe cleaning kit, and (e) 2-inches of cotton swab
Before starting, we’ll need to locate the probe cleaning kit within your NMR accessory package. This kit includes an 18-inch aluminum rod and several cotton swabs (figure 1d). Once you locate these items, take a look at the procedure below:
- Break a wooden swab into a length of about 1.5 – 2.0 inches (figure 1e). This allows for greater pressure to be applied to the rod. The more pressure (within reason) you can apply to the cotton swab, the easier it is to polish the stator.
- Insert the broken end into the aluminum rod making sure the cotton swab holds firmly in place. We don’t want the swab to fall out during cleaning!
- Soak the cotton swab in acetone or isopropanol.
- Insert your cleaning tool cotton swab down into the probe at the depth of the stator.
- While simultaneously pushing out against the side wall, jab (within reason) down at the stator surface (figure 1c) with a firm, quick motion. Be sure to go all the way around the stator several times, always pushing out and down at the same time. Our emphasis will be on the machined holes and aluminum surface in direct contact with the spinner (contact shown in figure 1b). Please do not clean any lower than the stator surface.
- Pull the swab from the probe and inspect it. If it appears to be dirty, return to step 1, replacing the used swab with a clean one and repeat the process until a new swab comes out clean.
When you start to see little-to-no oxidation (seen as a dark grey color), on your cotton swabs, give the sample another try! First, clean the spinner with isopropanol, inject the sample, and see how well it rotates. Finish by running the ‘spin’ routine on a water sample to set your spin rate. Handle the spinner carefully with a Kimwipe to prevent further buildup of dust, dirt, and moisture within your probe.
In the rare case that an in-lab cleaning doesn’t solve your problem, head over to the Youtube page for additional content on how to clean a probe. Better yet, give us a call at 866-494-9369. The solution might be as simple as polishing or replacing a spinner that has been damaged. If it won’t spin, a replacement may be needed. We’ll also check your instrument history to see if it’s time for a factory probe cleaning. After years of hard work, many of our clients send probes in for a little bit of TLC. The point is, relax! We spin for a reason as should anyone who does NMR. So. Can. You!
